How to Create Custom Categories and Fields for a School in openSIS
Creating custom categories and fields in openSIS allows you to store and manage school-specific information tailored to your unique needs. Here's a step-by-step guide on how to create custom categories and fields for your school.
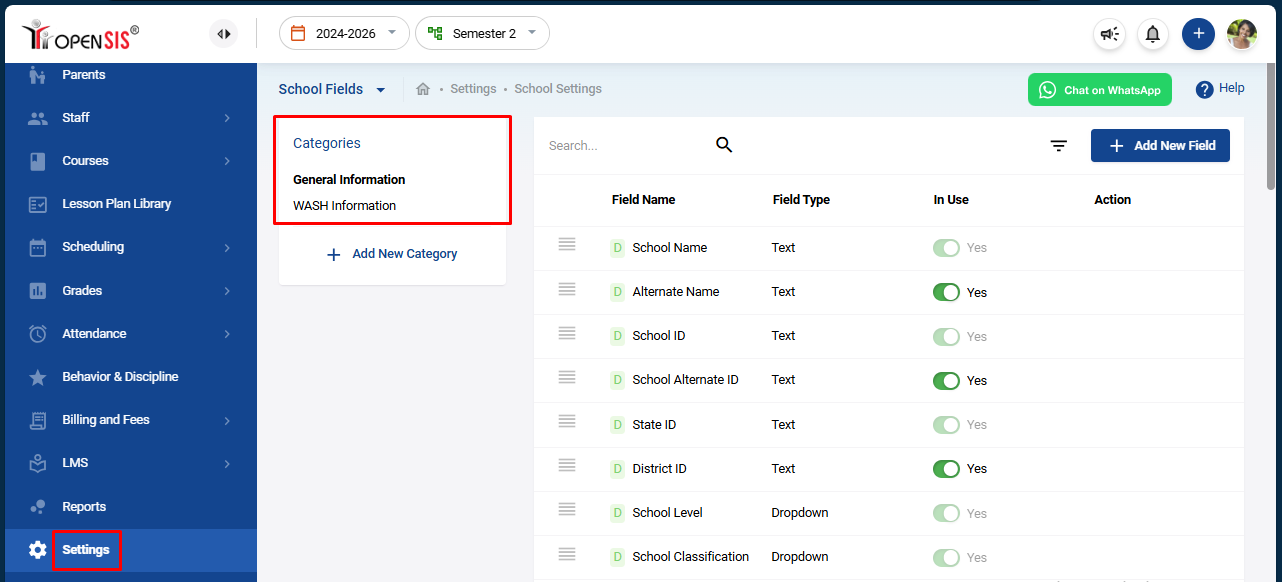
Step 1: Access the School Fields Settings
Log in to your openSIS account.
From the navigation panel, go to Settings.
Under the School header, select School Fields.
Here, you’ll see the existing categories like General Information and Wash Information.
Step 2: Add a New Category
Click on "Add Category":
- At the top of the categories list, click the Add Category button.
- At the top of the categories list, click the Add Category button.
Enter Category Details:
- A modal will open where you’ll need to input the Category Name.
- Enter the Sort Number to determine the order in which this category will appear in relation to other categories.
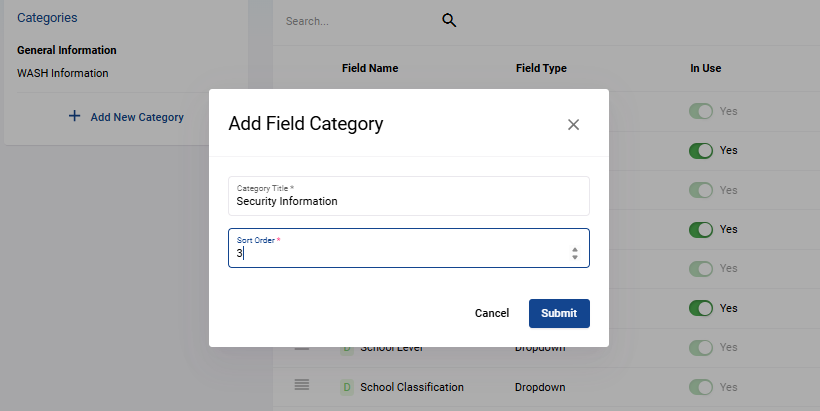
Submit the Category:
- Once you’ve entered the details, click Submit to add the new category.
- Once you’ve entered the details, click Submit to add the new category.
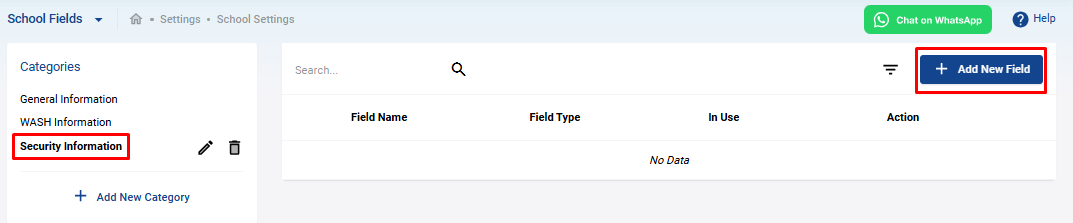
Step 3: Add Custom Fields to the Category
Select the Category:
- Click on the name of the category you just created.
- Click on the name of the category you just created.
Click on "Add New Field":
- In the top right corner, click the Add New Field button.
- In the top right corner, click the Add New Field button.
Enter Field Details:
- Field Name: Enter the name of the field.
- Field Type: Select the field type from the dropdown menu. Options include checkbox, radio button, textbox, or simple text field.
- Default Value: If the field requires a default value, enter it in the Default field.
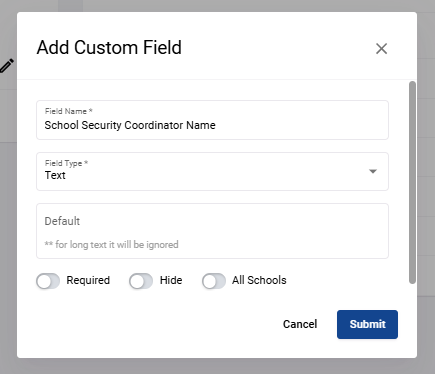
Configure Field Options:
- Required: Toggle this switch to make the field mandatory for users.
- Hide: Toggle this switch if you want to keep the field hidden from the form.
- All Schools: Toggle this switch to make the field visible in the form for all schools.
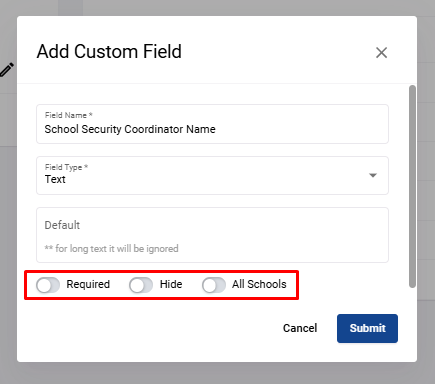
Submit the Field:
- After filling in the necessary details, click Submit to add the new field.
- After filling in the necessary details, click Submit to add the new field.
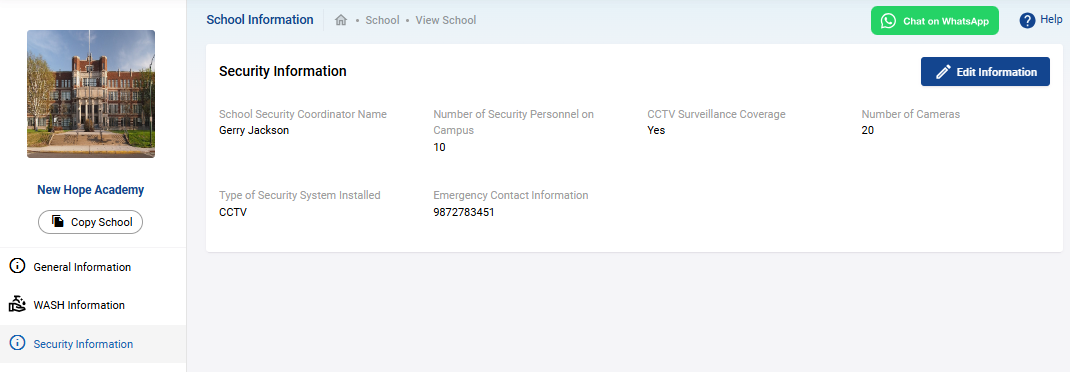
Step 4: Verify the New Category and Fields
- After creating the category and fields, go back to the School Information section under Schools and check if the new category appears in the navigation submenu.
By following these steps, you can easily create custom categories and fields that suit your school's specific requirements, allowing you to manage information more effectively in openSIS.
Related Articles
How to Map Custom Fields from Moodle to openSIS
When integrating Moodle with openSIS, only basic fields such as First Name, Middle Name, Last Name, Login Email, and Phone are retrieved by default. However, in Moodle, you may create custom fields for users, and similarly, you can create custom ...How to Copy a School in openSIS
Copying a school in openSIS is a useful feature that allows you to quickly create a new school by duplicating the setup and configurations of an existing one. This can save you time and ensure consistency across multiple schools within your ...Add a School
Add New School After logging in to openSIS you can create a new school. Click on the '+' button on the top right corner of the page Here you will find options to create a new school, new student, new staff, a new event in the calendar, and notices ...Billing and Fee Management Setup
The Billing and Fee management module allows the school administrator to charge fees to students and receive payments. To get started with using this feature you have to first go to Main Menu >> Settings >> Billing and Fees. There are three setup ...How to Get Data from Moodle into openSIS
When schools implement openSIS after they have been using Moodle, that Moodle data needs to be synchronized into openSIS before starting transactions with the integrated products. openSIS provides seamless integration with Moodle, enabling schools to ...