How to Copy a School in openSIS
Copying a school in openSIS is a useful feature that allows you to quickly create a new school by duplicating the setup and configurations of an existing one. This can save you time and ensure consistency across multiple schools within your organization. Here’s a step-by-step guide on how to do it.
Step 1: Navigate to School Information
Go to Schools:
- From the navigation menu, click on Schools to access the list of schools managed in openSIS.
Access School Information:
- Select School Information from the options available under Schools. This will take you to the details page of the current school you wish to copy.
Step 2: Initiate the Copy Process
- Click on "Copy School":
- Under the actual school name, you’ll find a button labeled Copy School. Click on this button to begin the process of copying the school.
- Under the actual school name, you’ll find a button labeled Copy School. Click on this button to begin the process of copying the school.

Step 3: Configure the New School
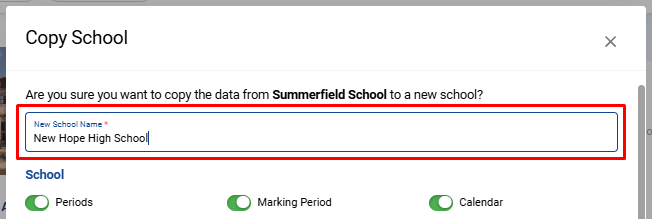
Enter the New School’s Name:
- A modal window will appear where you need to enter the name of the new school. This is the name that will be assigned to the copied school.
- A modal window will appear where you need to enter the name of the new school. This is the name that will be assigned to the copied school.
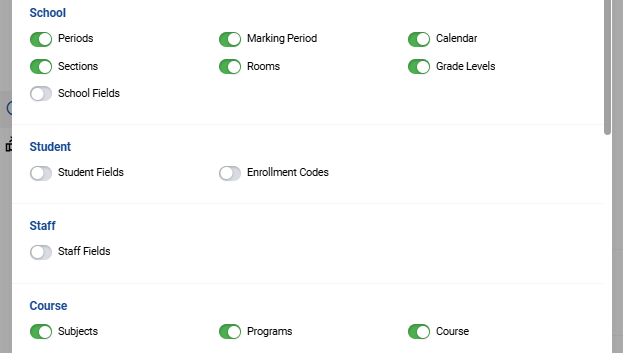
Select Items to Copy:
- In the same modal, you’ll see options to switch on or off the items you wish to copy from the current school to the new school. These items might include things like:
- School Calendar
- Grade Levels
- Student Fields
- Staff Fields
- Courses and Sections
- Switch on the items you want to include in the new school and switch off the ones you do not wish to copy.
- In the same modal, you’ll see options to switch on or off the items you wish to copy from the current school to the new school. These items might include things like:
Step 4: Create the New School
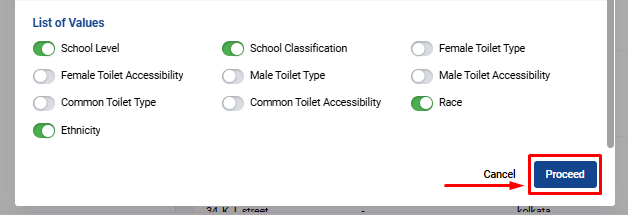
Click on Proceed:
- Once you’ve selected the items to copy, click the Proceed button. This will initiate the creation of the new school with the configurations and data you’ve chosen to duplicate.
- Once you’ve selected the items to copy, click the Proceed button. This will initiate the creation of the new school with the configurations and data you’ve chosen to duplicate.
Confirmation:
- After the process is complete, the new school will be created and added to your list of schools in openSIS, with the selected items successfully copied over.
By following these steps, you can efficiently create a new school in openSIS by copying the setup from an existing one. This feature is particularly useful for managing multiple schools with similar configurations, ensuring that your setup is consistent across the board.
Related Articles
Google Classroom Integration with openSIS – Setup Guide
Overview openSIS allows administrators to integrate Google Classroom with their openSIS instance, enabling seamless synchronization between the Student Information System (SIS) and Google Classroom. This article provides step-by-step instructions for ...How to Set Up WASH Information for Your School in openSIS
Understanding WASH Information in Schools WASH stands for Water, Sanitation, and Hygiene. It's a critical component in ensuring a safe and healthy learning environment in schools. Proper WASH facilities, including clean drinking water, ...Add a School
Add New School After logging in to openSIS you can create a new school. Click on the '+' button on the top right corner of the page Here you will find options to create a new school, new student, new staff, a new event in the calendar, and notices ...How to Create Custom Categories and Fields for a School in openSIS
Creating custom categories and fields in openSIS allows you to store and manage school-specific information tailored to your unique needs. Here's a step-by-step guide on how to create custom categories and fields for your school. Step 1: Access the ...Setup and Manage Communication Groups
Creating a broadcast group in openSIS allows you to send messages to multiple users simultaneously, streamlining communication within your school management system. Here’s a step-by-step guide on how to create a group and send a message to that ...