Once you log in for the first time, you are shown a screen as given below. The screen has 6 categories with items that you have to set before you can start enjoying openSIS.
1. School Setup
(a) Calendar - The calendar will be already created for you. Just click on the calendar days and mark the events and holidays of your institution.
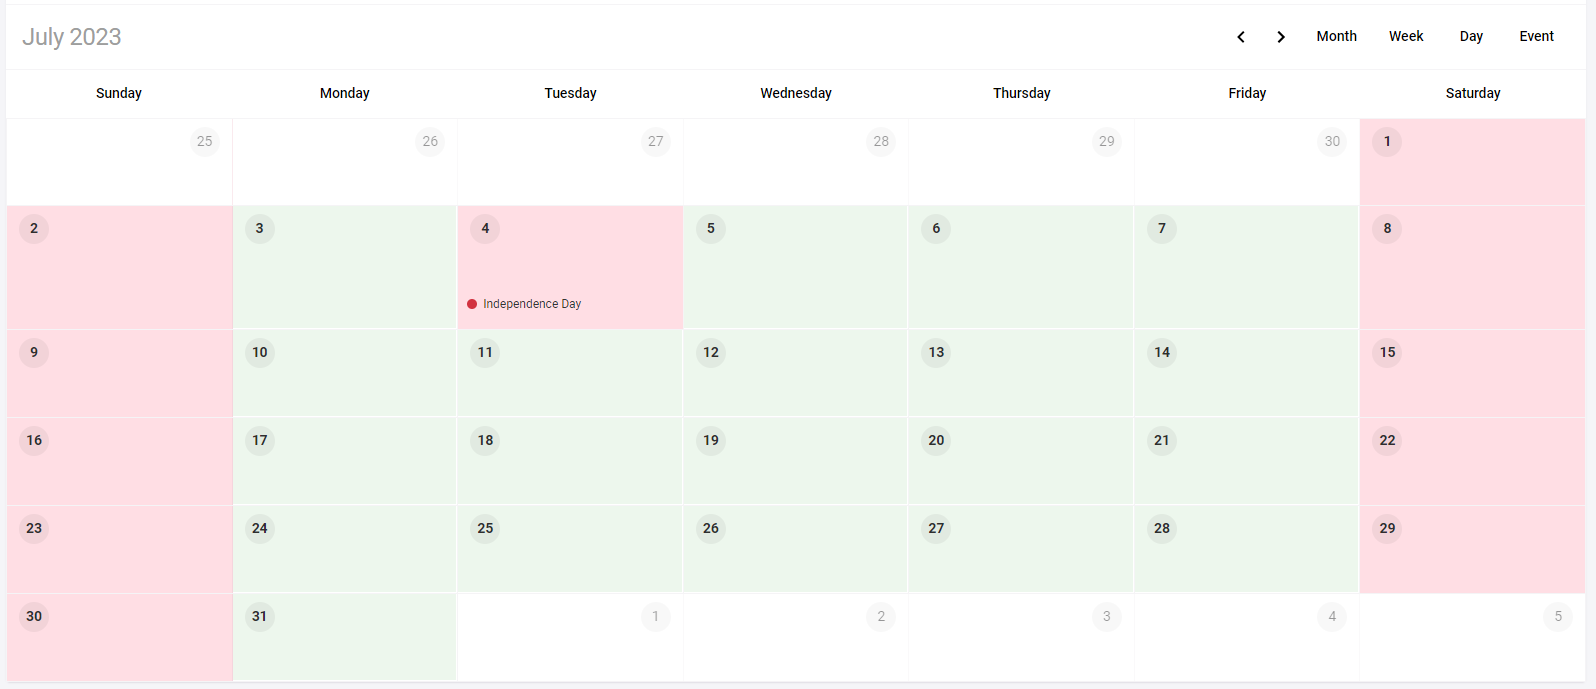
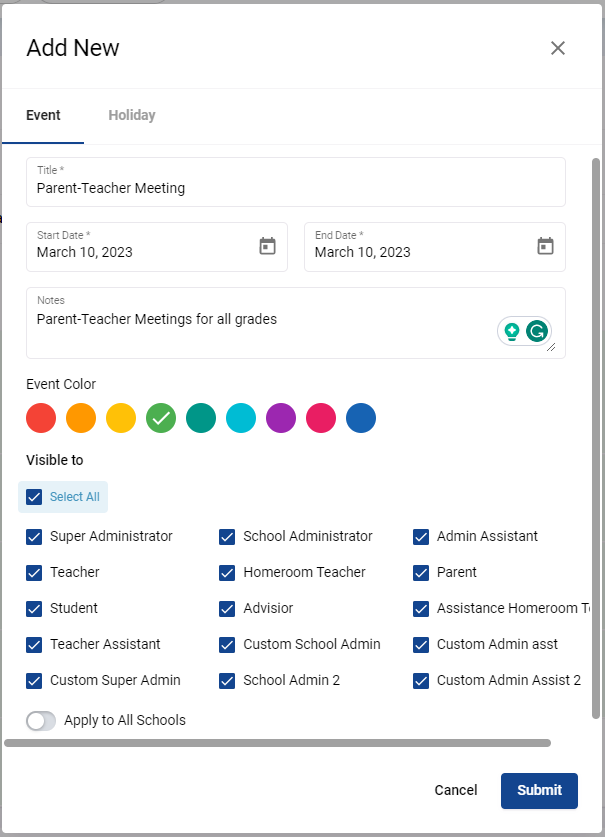
Click on any calendar day and a pop-up will open allowing you to enter an event or mark the day as a holiday. It is important to mark the holidays because if you don't then the system will generate missing attendances for those days.
(b) Marking Period - Begin the marking period by creating a full year with start and end dates. Now the full year needs to be divided into semesters & quarters as per school requirements. To create a marking period of a semester/quarter, click on the (+) and fill out the Title, Short Name, Marking Period Begins & End date, and Grade Posting Begins & Ends dates for that marking period.
Grade posting begins & ends indicates the span of time in which users can input final grades. As a good practice, you want the grade posting begin date to be close to the end of the marking and the end date to be a few days after the end of the marking period to allow the teacher to enter the final grades.
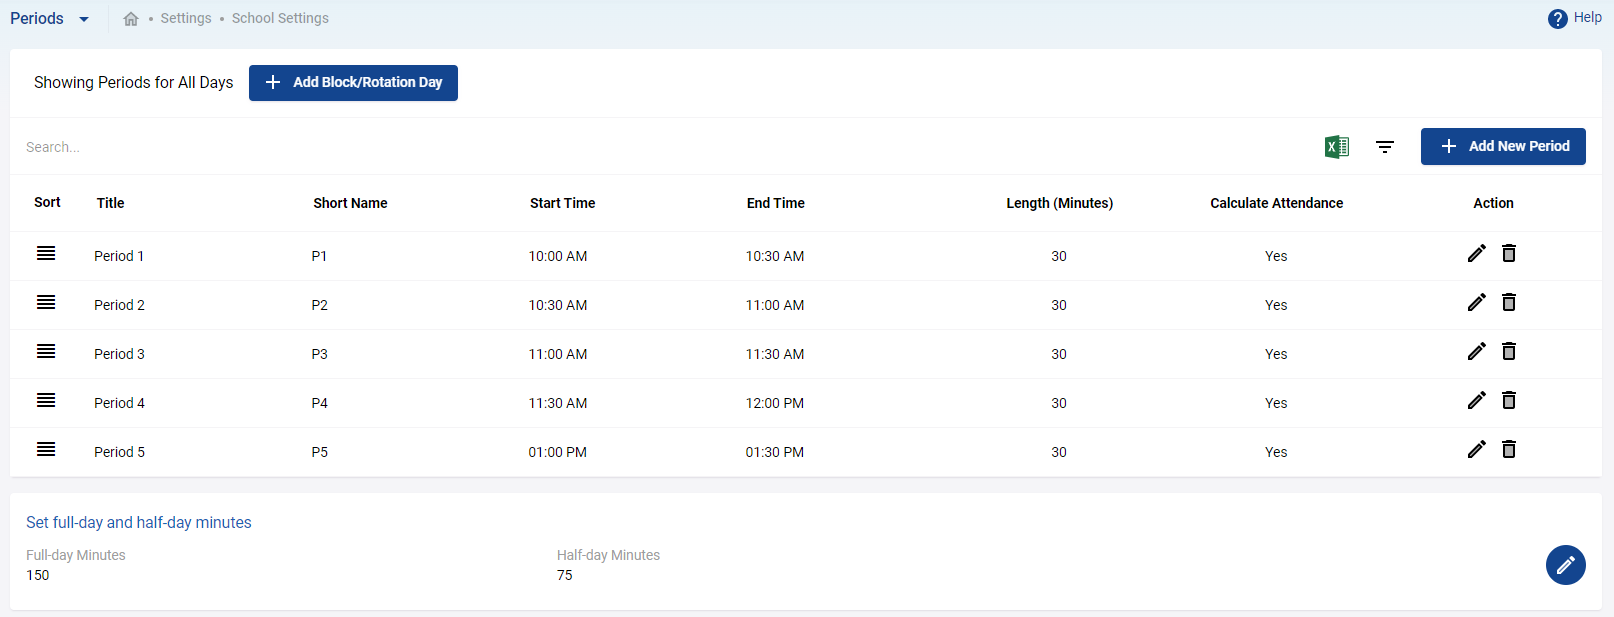
(c) Periods - Create the period by defining the time division of a school day. Click on add new period and fill out the form with the title, short name, start time, end time, and calculate attendance.
If the calculate attendance field is not set to "yes", then attendance for that period cannot be taken by the teacher or administrator for any course section that will occur during that period..
The half-day and full-day minutes are calculated automatically, but you can over-ride them for the desired value. The attendance calculation is done based on these values to determine if a student was present for the full-day or half-day in the school.
(d) Rooms - Create and define the classrooms that are used in the school. Click on Add New Room to add title, and capacity along with a brief description.
The list of Rooms will look like this. You can deactivate a room that is no longer in use. Rooms that are connected to course sections and have transactional associations like scheduling and attendance cannot be deleted.
(e) Grade Levels - Create different grade levels as per school requirements. Click on add new grade level and fill up the form with the title, short name, grade level equivalent, age range, educational stage, and next grade.
Pay particular attention to the Next Grade field when the school is rolled over at the end of each academic year, the students who are set to be promoted to the next grade are done according to the value you set here.
(f) Report Card Grade Scale - Click on +Add Grade Scale and fill out the fields as given below. As an example we have used the 4.0 scale value which is a typical scale value in the USA.
On the right side of the newly created grade scale, there will be option to enter the grades. Click on +Add New Grade and complete the grading table. As an example, we have used the US high school and college grading table. You can use your school's values in here.
You can keep the Weighted GP Value column empty if your school does not offer Advanced Placement (AP) classes which usually carries higher GP values.
After you complete the school set up the screen will look like this:
2. Add Staff
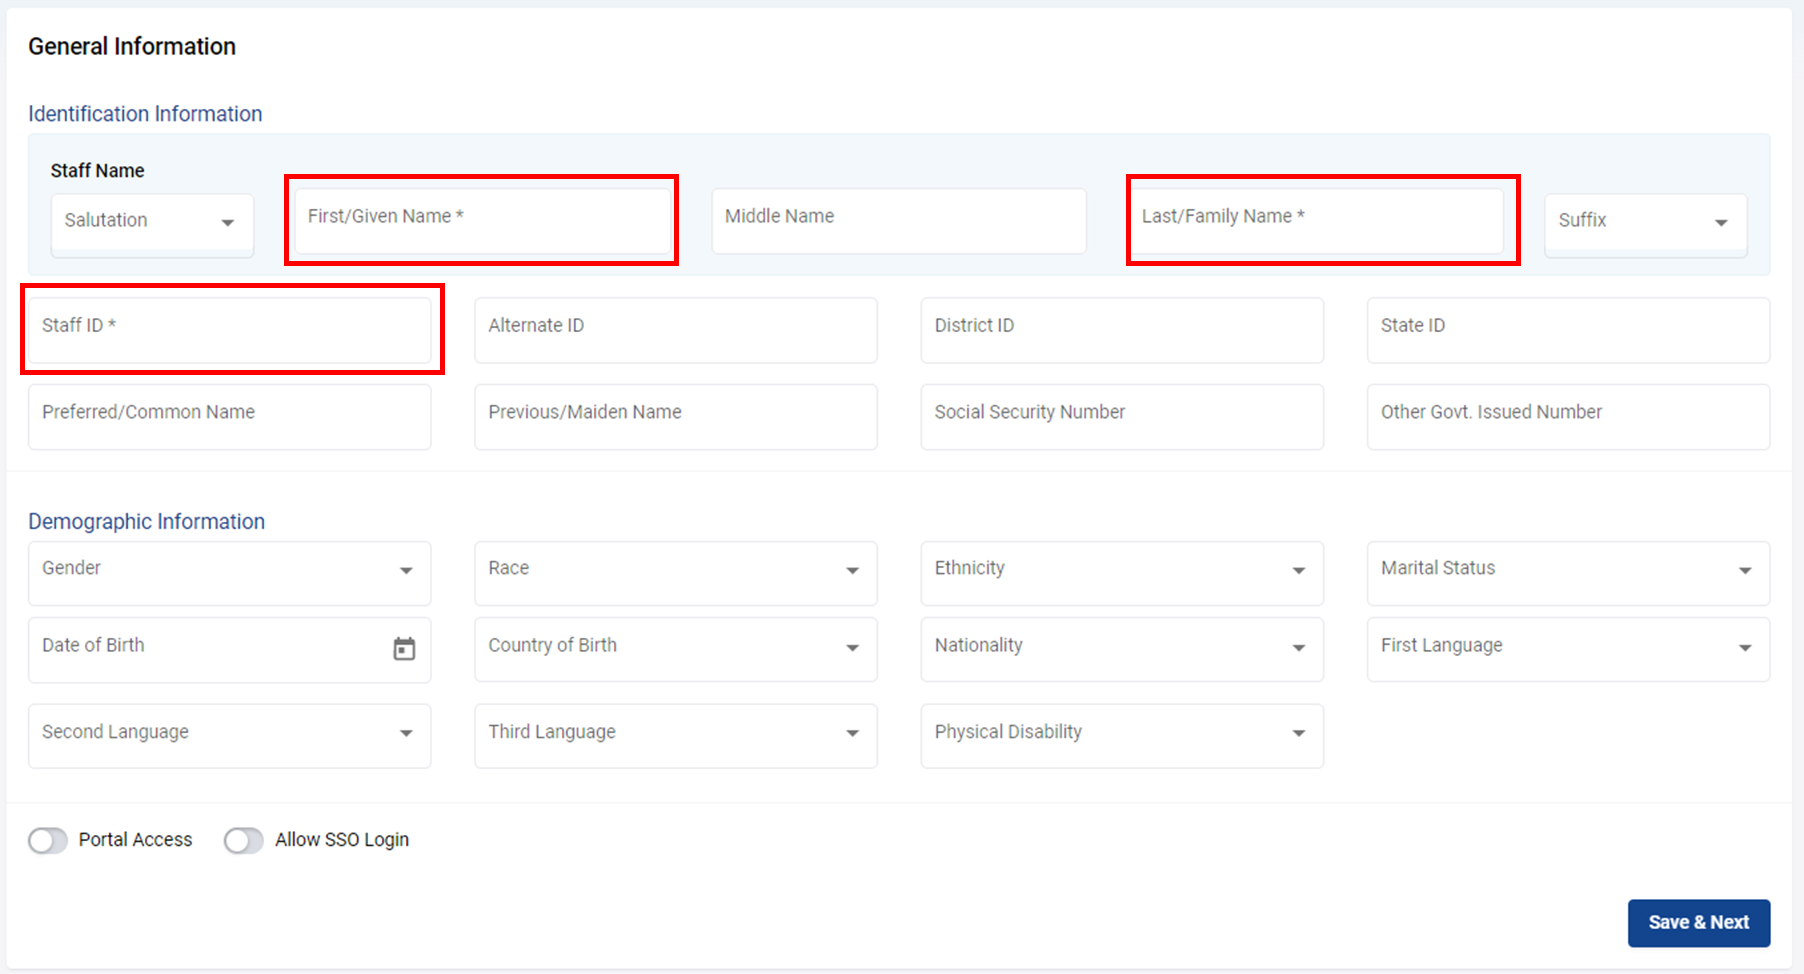
Click on Add Staff to add teachers and administrators to the school. You can start with minimum information like first name, last name, and staff ID and click on Save & Next to proceed to the next form.
Fill out the fields marked in red boxes. These are the minimum data you need to add staff into the system properly.
You can continue to add more staff manually or import in bulk via an Excel sheet.
3. Add Student
Click on Add Student, you can just enter the mandatory fields to start with and populate the rest later. Click on Save & Next to advance to the next screen where you will enter the enrollment information.
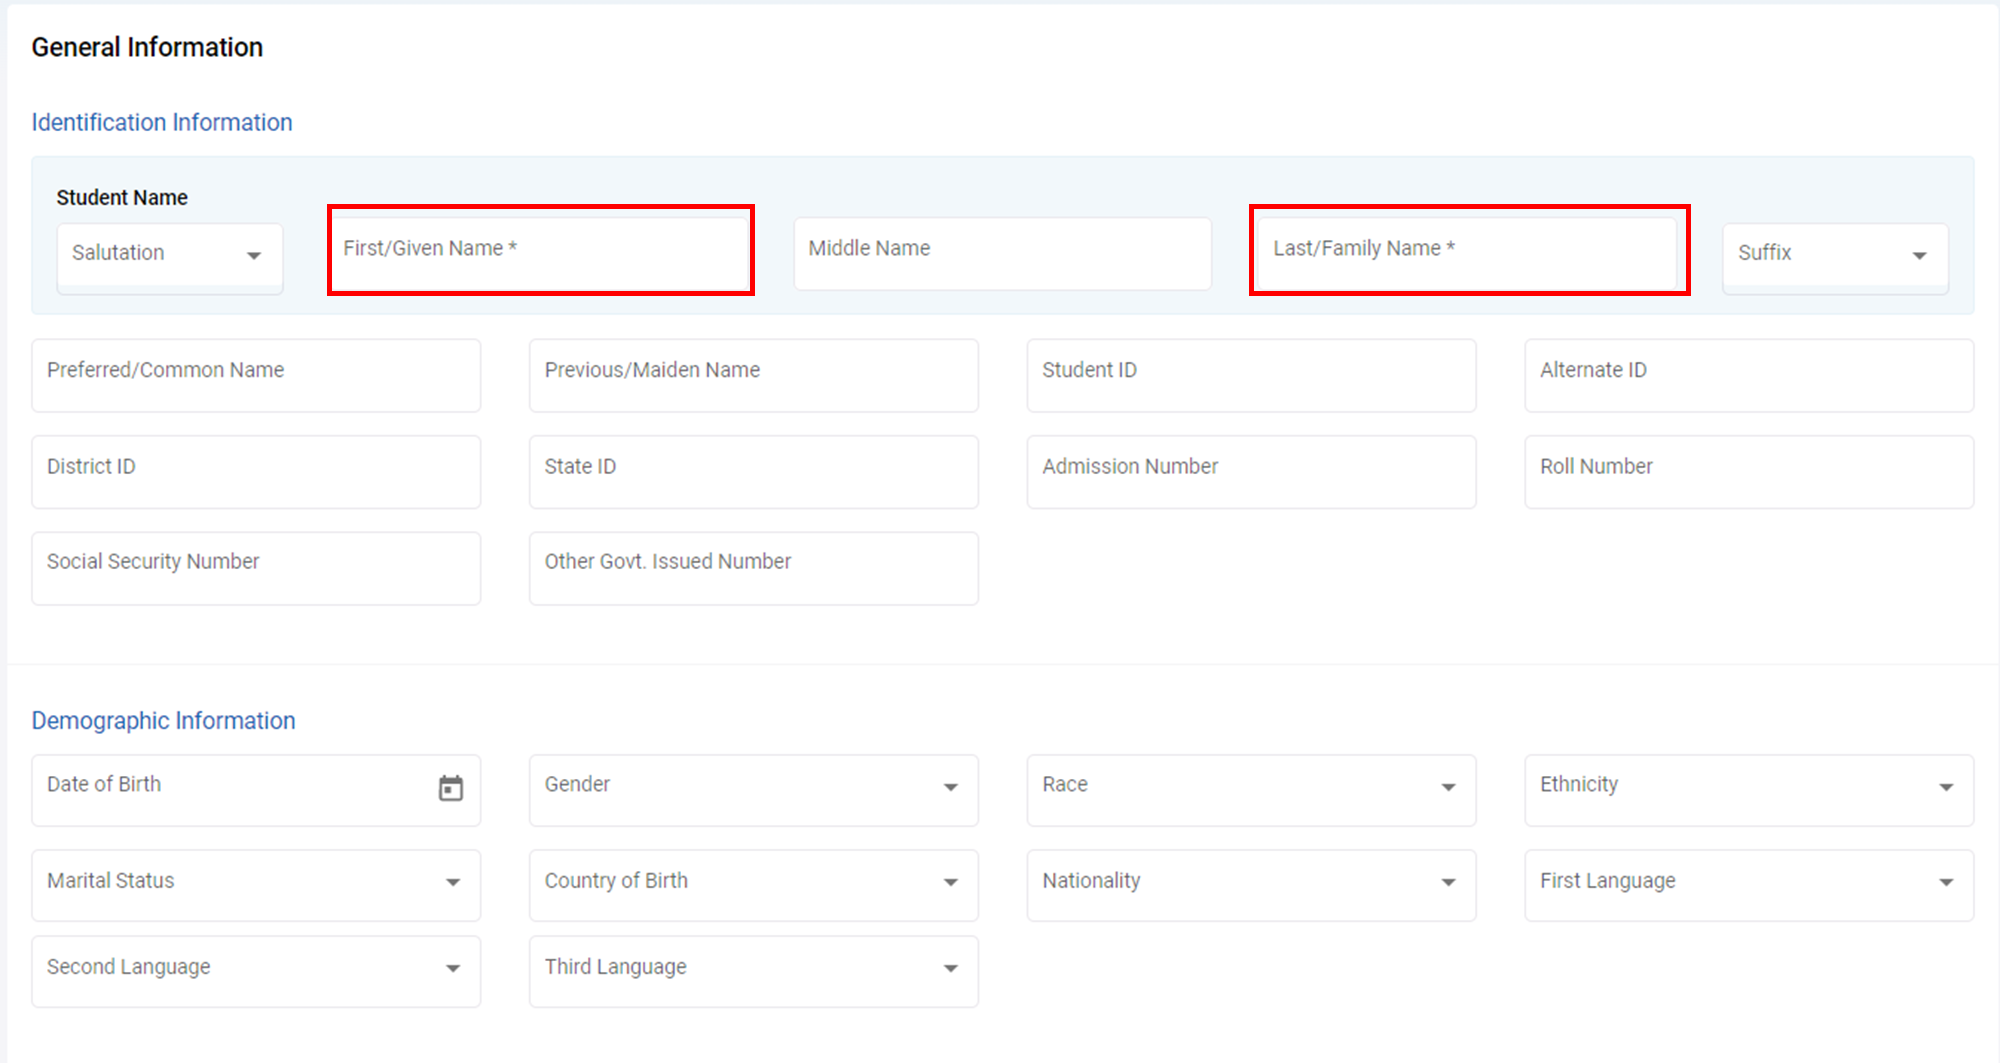
You will notice that the Student record is already created. Just choose the correct Grade Level, Enrollment Date and Enrollment Code and click update. That's it. The first Student is in the system.
You can continue to add students manually or import them from a spreadsheet.
4. Add Course
Click on Add Course and a screen showing zero course found will display. Click on the +Add New Course button and a pop-up will open. Here fill out the necessary fields. If you are adding a course for the first time, the Program and Subject will not be in the database. So add a Program and Subject name and Submit. Next time onwards that program and subject will be available in the drop-down.
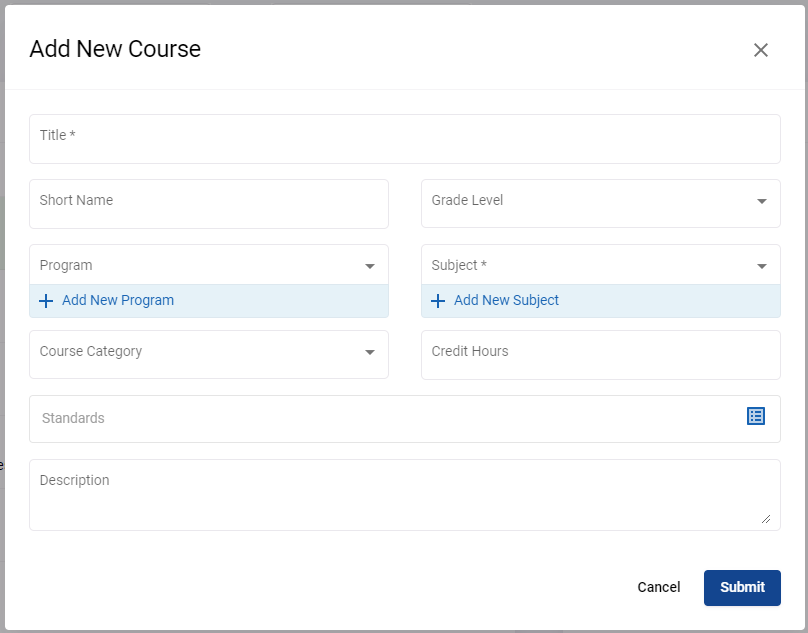
After you complete up to this point, the main menu on the left-hand side will open up. You will be able to navigate throughout the system.
5. Add Course Section
We will discuss how to create the course section in short here. The detailed course section creation with explanation of all features and switches are given in the article here: Add a Course Section
To create a Course Section, navigate to the Course. Click on the + Add New Course Section button.
We will describe the form by part. Let's start with the top portion.
By default, the Active toggle button will be turned on. You can turn it off if you are not ready to publish the Course Section and it won't show on the course catalog.
Duration of a course section can either follow a marking period or occur on a custom date range.
If the course section occurs during a pre-set marking period, then select the value from the drop-down. If it occurs in a custom date range, then select the start and end date from the date picker.
The custom date range allows trade schools to start and end a course within any date range without having to setup marking periods.
For Schedule Type, there are several options. To keep it simple for first time setting, we have used the fixed schedule as an example.
Fixed Schedule - this option is used when a course section occurs one or more days (in a week) during the same period (time) and in the same room. Select the Room, Period, Meeting Days and turn on Take Attendance switch if the teacher marks attendance for the class.
Click Submit to Save the Course Section.
6. Schedule Teachers and Students
You can schedule a Teacher and a Student from Scheduling.
For Teacher Scheduling go to Menu>> Scheduling >> Schedule Teacher
Search a Teacher with the available options or do a blank search to display all teachers by clicking on the Search button. Select a Teacher from the list. You can schedule more than one Teacher for a particular course section and you can assign a teacher for more than one-course sections.

Click on the Course Section to search and select the course section.
After you select Teacher and Corse Section, click on the Check Availability button to check for possible conflicts. If there are no conflicts, the system will show a message and you can click on Start Scheduling to schedule the teacher to the course.
Menu>> Scheduling >> Schedule Student
Student scheduling works the same way as that of teacher scheduling. The single screen allows you to schedule a single to student to a single course or multiple courses, multiple students to a single course or multiple courses.
Once you select the students and the course section and click schedule students, the system will schedule the students and will reject the ones that have a conflict. It will also create a conflict report so that you can retry with different course sections.
Search a student with the available option and select the Students from the list that will be generated after searching, you can schedule more than one student for a particular course section.
To search a course section follow the same process, before scheduling check/select the Schedule Date, and schedule the students.
The Schedule Date is an important date. Students are scheduled into the course section on this date. So, if you are scheduling students into a course section that has already started, make sure to back date the schedule date to the start date of the course section.
Once all the setup is completed you will see the Dashboard as shown below:
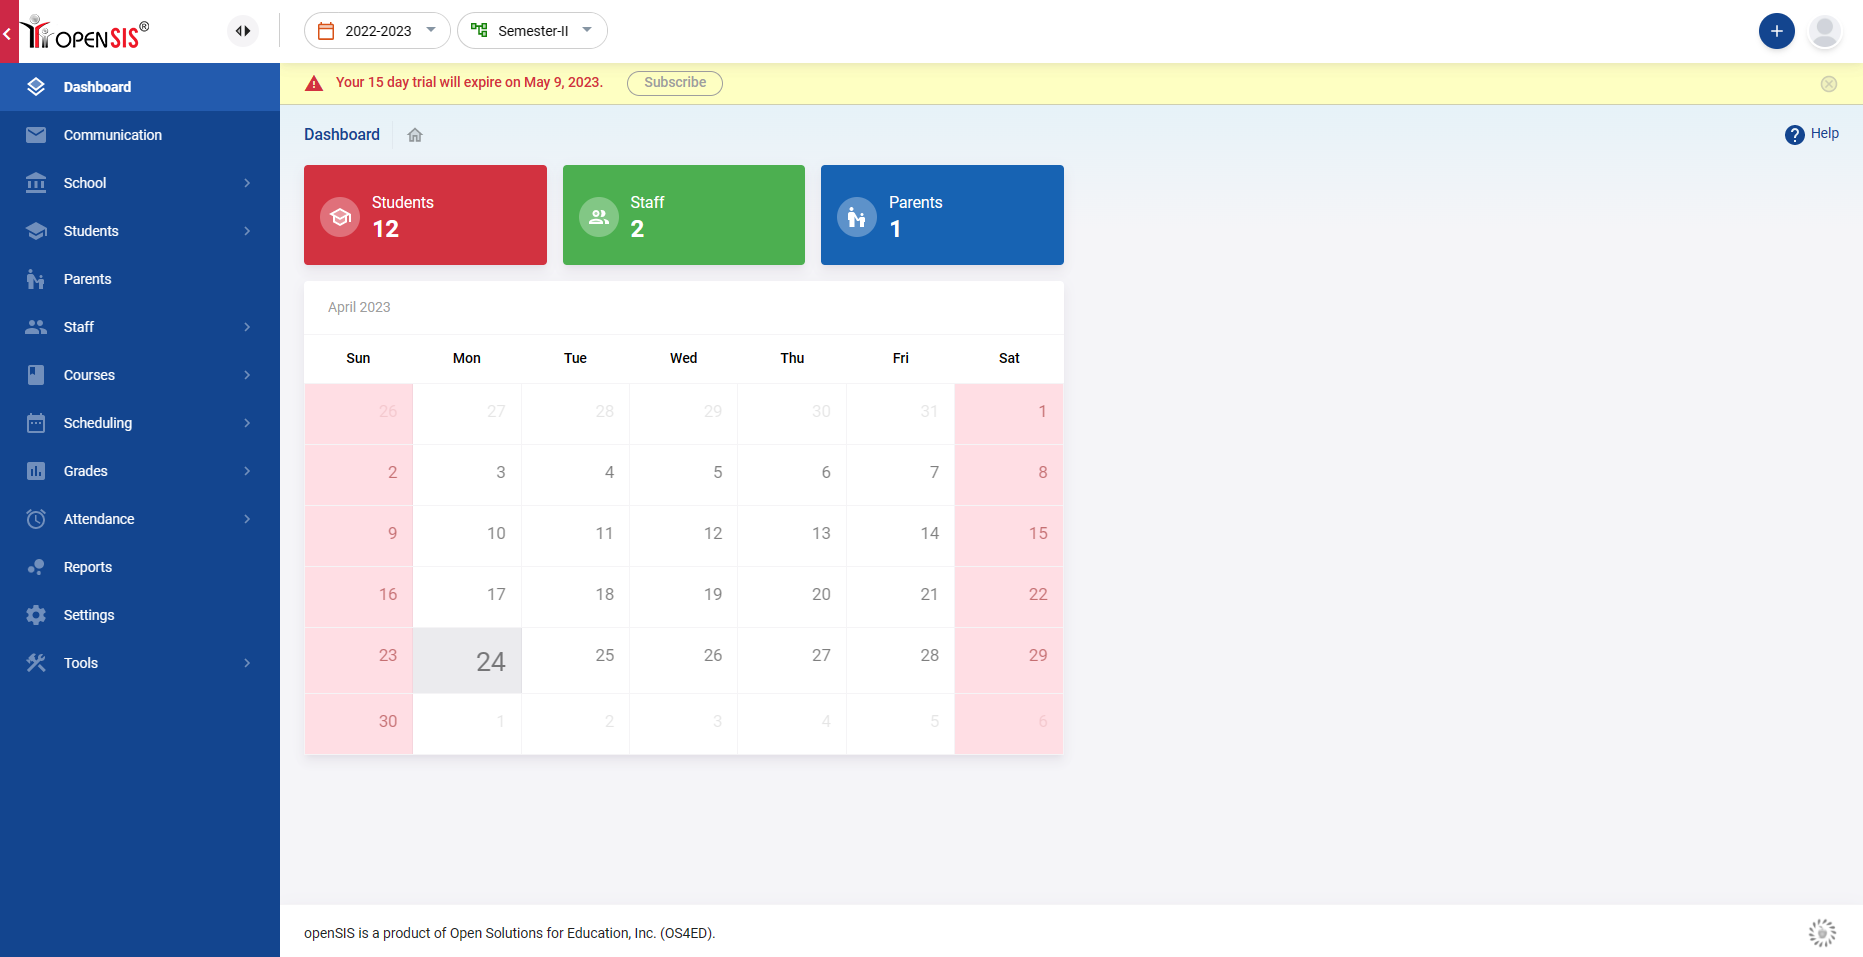
Congratulations, you have successfully set up openSIS and are ready to administer your school!


